


Repairing Pearl Stud Earrings
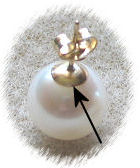
Author: The Pearl Market.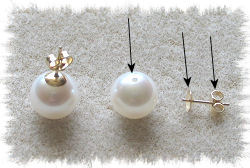 As shown in the picture on the right, a typical stud earring consists of three parts - the pearl, a cup and stem, and a butterfly which is pushed onto the stem to keep it secure in the ear.
The pearls are drilled halfway through. The bit of stem that sticks out of the cup goes into the hole and the cup and stem are fixed to the pearl with a small amount of glue.
That's all that holds them together. Sometimes the cup and stem detach from a pearl but that doesn't mean the earrings are ruined or need a visit to the local jeweller. It's usually possible to do a simple and satisfactory home repair.
 You don't need any. All that's necessary is something to hold the stem firmly - a clothes peg is good, or even your fingers - and some glue.
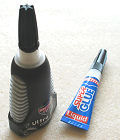 Glue - there are lots of adhesives with fancy names like 'jewellers' epoxy' but a tube of superglue will do fine. Use a brand name product containing cyanoacrylate - not one of those packs of 20 for a £1 you get in discount stores. If possible buy gel rather than liquid. It just makes life a bit easier.
Doing The Repair
Use a needle or pin to clear out any old adhesive from the cup and drill hole. Clean off old adhesive around the pearl drill hole with a fingernail. Make sure the cup and stem fit snugly onto the pearl before glueing.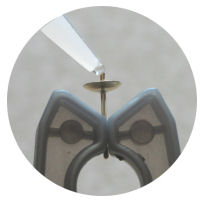
Grip the stem with the peg or your fingers and apply a small blob of gel to the tip. If you are using liquid glue let a drop run down the stem and into the cup.
 Don't overdue the glue. If there's too much sitting in the cup use the corner of a tissue to absorb the surplus.
Push the pearl onto the stem. The gel will be carried down into the cup.
Don't overdue the glue. If there's too much sitting in the cup use the corner of a tissue to absorb the surplus.
Push the pearl onto the stem. The gel will be carried down into the cup.Twist the pearl clockwise and anti-clockwise a couple of times to make sure the glue is evenly spread around the cup. Then apply downward pressure for 30 seconds and leave to set for half an hour. There - you're done.
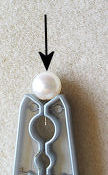
 Whoops...
If you've used a bit too much glue you might find that it overflows the cup and spills out onto the pearl (arrow).
Don't try to clean it up or wipe it off - you'll just smear it onto the pearl.
Leave the glue to set for several hours - until it's crispy, not soft. Use the tip of a razor blade or stanley knife to raise an edge of the glue outside the cup. Take care not to scratch the pearl. With luck, you can now peel off the glue around the cup. A fingernail is ideal for flicking off anything that remains.
Repairing Pearl Stud Earrings - A Step-by-Step Guide
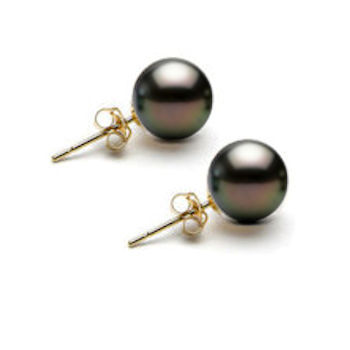
Or just fancy some new, high-quality earrings ? See our collection of beautiful stud and drop earrings.

Prevention is better than cure
It's not uncommon for stud earrings to come apart. Tugging on the pearls to remove them from the ear weakens the bond between the pearl and the earring cup. Eventually, it gives way.It's better when removing earrings to get your fingers behind the cup before pulling. That way the bond isn't stressed.